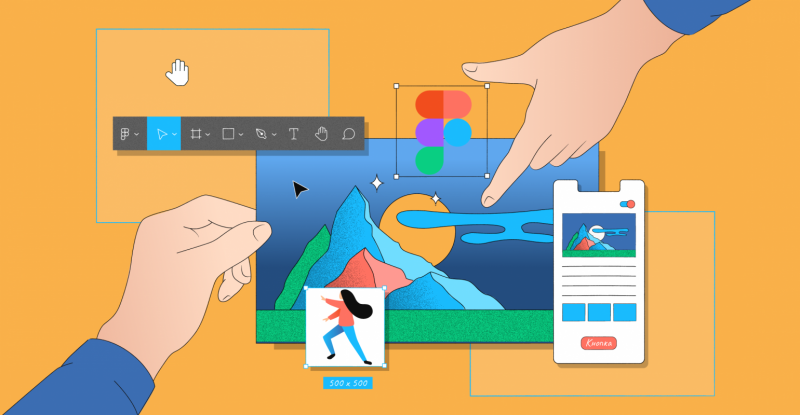
How to make a photo filter in Figma
Briefly and clearly, we tell you how to quickly achieve an interesting effect for your project.
Figma has a lot of different effects that help designers quickly make something interesting and high enough quality for a commercial project. In this tutorial, we will tell you how to make a filter for a photo.
To make a filter, you will need the Noise & Texture plugin – you can download it from this link.
This way of drawing a pattern was invented by designer Vijay Verma. You can read the original instruction in English on Twitter.
Pattern preparation
- Take any black and white photo from the Internet. We will use photos from Unsplash.
- Add a 100×100 pixel square to the layout. Then, in the settings sidebar, in the Fill block, recolor the square to black.
- In the same menu, instead of Solid, select Linear. Set the first color of the gradient to 80% opacity and the last color to 10%. Then, on the canvas, rotate the gradient line so that it points from right to left ←.
- Reduce the width of the square to 50 pixels, copy and paste it side by side. Then select them and press Ctrl (⌘) + G to group them.
- Add another square of arbitrary size to the layout. For example, 1000×1000 pixels.
- Right click on the shape, hover over Plugins and select Noise & Texture. In the window that appears, click on the icon with the picture image and then click on the group with gradients. Then click on the empty shape.
- In the same plugin window, specify the maximum Amount and Size — it is important that you do not have extra horizontal lines in the preview.
- Click the Add to layer button. Select the image that appears, then in the settings sidebar in the Fill block, click on its sample. In the window that appears, next to the word Tile, enter the value 10%. If in this case there are too many horizontal lines, then the number can be increased.
Creating an effect
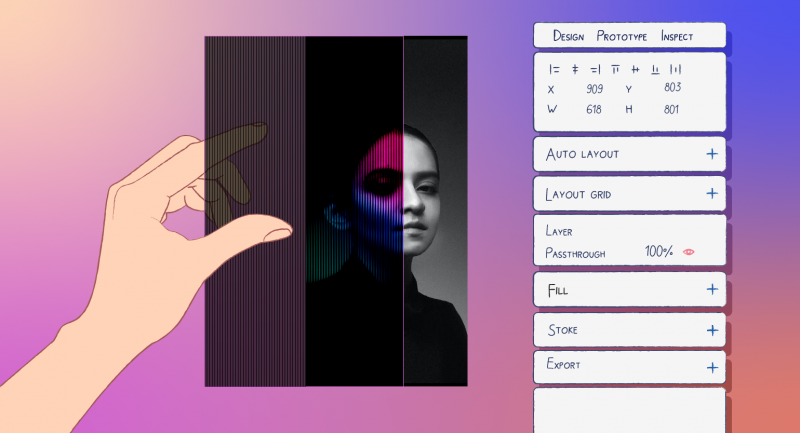
- Add an iPhone 14 size frame to the layout and place the pattern layer inside it.
- Select the pattern layer, in the settings sidebar in the Layer block, change Pass through to Color dodge. Then, in the Effects block, click on the plus sign, instead of
- Drop shadow, select Background blur, then click on and specify a value of 12.
- Make a copy of the layer – in the layers panel it should be above the original. Then in the Layer block change Pass through to Color burn. For convenience, both texture layers can be grouped and locked so that they do not interfere.
- Recolor the frame black and place the photo in it – it should be under the pattern layers.
- To add color to a photo, you need to add color spots above it. Add a circle, in the
- Effects block, click on the plus sign, instead of Drop shadow, select Blur, click on and set the value to 132. In the Fill block, specify an opacity of 50% and a not very bright color, for example #AD51BC.
- There can be as many colored circles in a photo as you like. We used six with colors #AD51BC, #BC5184 and #51BCB6. If the color is too bright or not visible at all, change the opacity, but it should not exceed 70%.
Result:
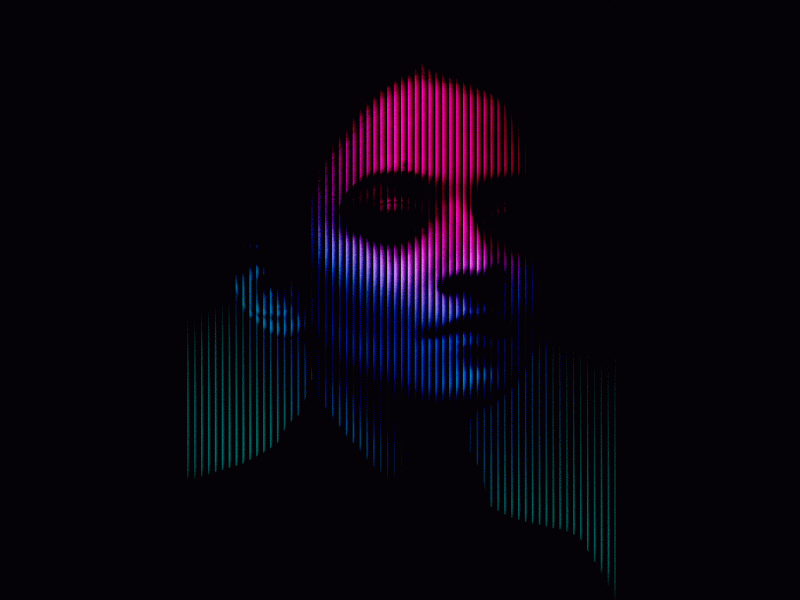
Image: Yash mevawala / Unsplash / Skillbox Media
Text
- Copy the resulting work and remove the photo with color spots from it.
- Add a white text layer to the layout and turn it into a component. This is necessary so that you can change the entire text at once as you like, and not separately by layers.
- Copy the component into the frame with the effect and place it below the pattern in the layers panel, just like you did with the photo.
- Make a copy of this text layer. Then in the Effects block, click on the plus sign, instead of Drop shadow, select Blur, then click on and set the value to 159. In the Stroke block, click on the plus sign, set the color to #EBFF00 with 94% opacity.
- Change Outside to Center and set the Stroke Weight to 29px. In the Fill block, click on the minus sign or the eye icon next to the color.
- Make another copy of the text and place it under the previous yellow layer. This layer needs to be done in the same way as the previous one, but its settings will be slightly different. Blur – 72, stroke color – #BD00FF with 64% opacity, stroke weight – 180 pixels.
- If you use other colors, then make sure that there is no obvious black border between the colored spots. This can be adjusted by color saturation and blur.
Result:

Image: Skillbox Media