Coffee table with their hands 5 detailed instructions
You love designer things, but frustrated sigh, looking at the price tags that adorn them in stores? Try to become a designer yourself. Think it’s hard? Nothing of the sort! Following the instructions, you can easily create your own hands an original piece of furniture from scrap materials. And start we offer from the coffee table – such a simple, but very important piece of furniture. Believe me, for this table, you’ll be happy to drink tea and your guests will marvel at your skills. In addition, creating a coffee table with your hands, you literally fill your home with warmth and put him in a piece of his soul. So try it, definitely worth it.
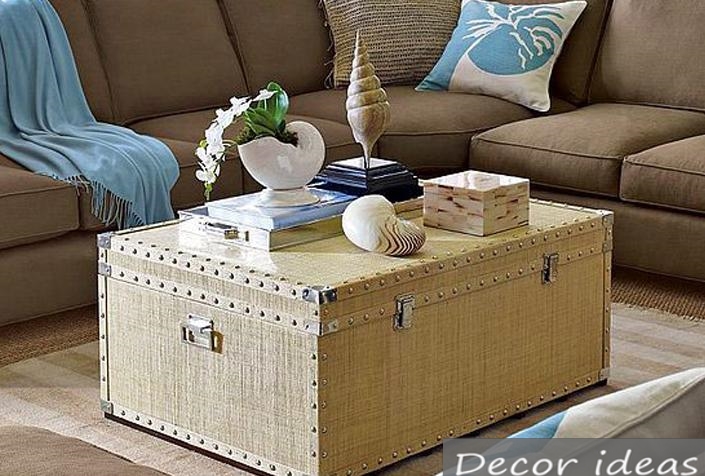
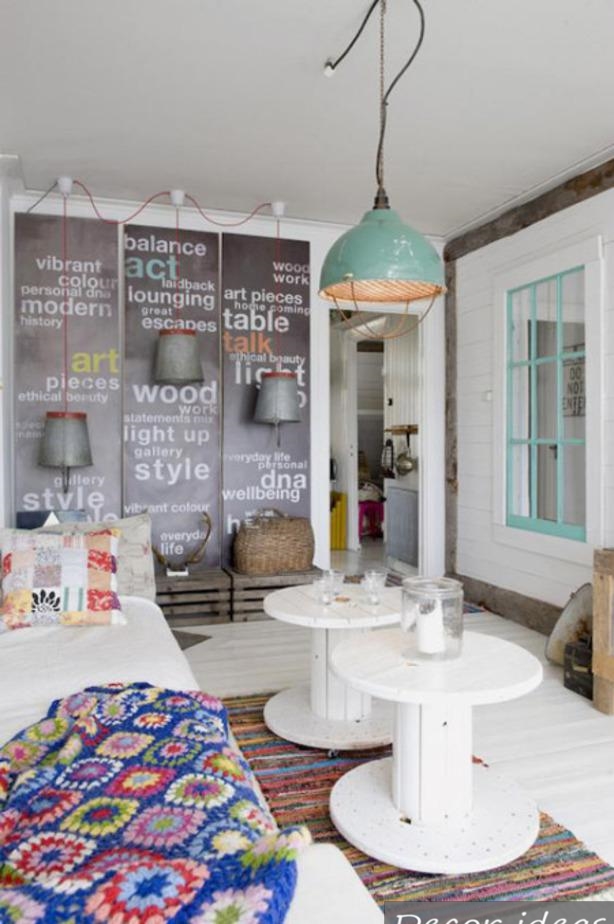
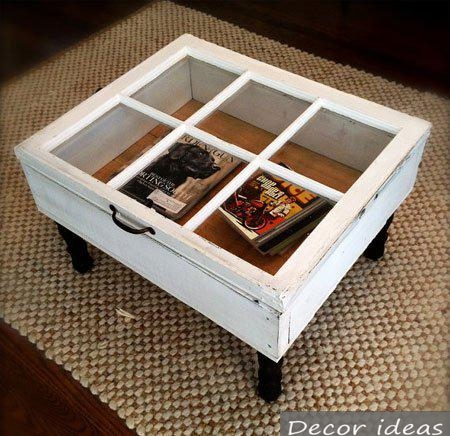
Coffee table in a nautical style

The idea in the style of “romantic”. All year round, a drink at this table, you will remember the warm sea, the gentle surf and the moon path. “Sea” a table is a tenderness, elegance and originality in the heart of your kodomo.
How to do?
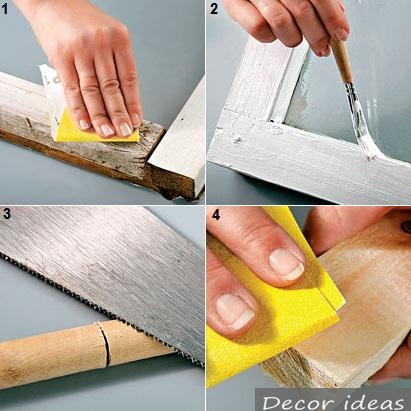
1. Take an old window frame and clean it from dust and dirt. If the old glass is cracked, new, paste, then get rid of the layer of old paint and finish off the surface with sandpaper. Then you need to remove metal parts, which are additionally fixed frame parts.
2. Cover the frame with white enamel or acrylic paint. If you chose acrylic paint, after drying, treat it with emery to fly out of the wood so the table will look aged, giving it a special sophisticated look. You can also use the two colors by selecting the white-blue scheme. First, paint the frame with blue paint, and after drying the first layer – cover white. When dry a second coat, RUB his sandpaper – then from under the white paint will act as blue.
3. Make legs for the table. To do this, take the handle and sawed it into 4 equal pieces (each about 34 cm), and then go over them with emery paper to remove all roughness.
4. Further it should be sawn trim furniture Board or boards of the same width as the frame, and a length of about 8 cm, then processing of the stand legs with emery.
5. Now every single blank need to drill in 4 places. Pre-mark and then drill a hole for fastening the legs, and another
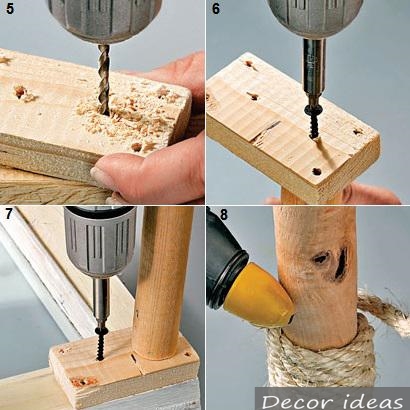 – in any convenient place in order to secure the legs safer.
6. Then, using long screws to attach each leg to the base.
7. Next you need to attach the legs to the frame with screws. The window frame is a “box” in which will need to fold all imported from the rest of the seafood – the front part of the frame, which stands on the legs will be facing the floor down.
8. Now you will need a rough thin rope, which will need to braid each leg. Secure the rope using glue gun.
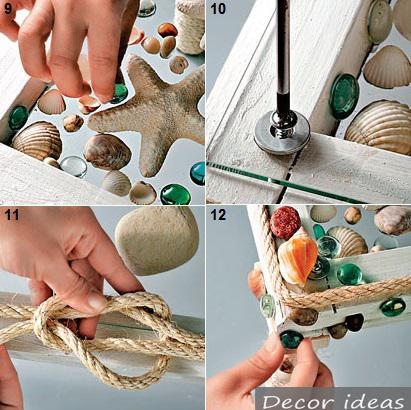
9. Now you need to wash and degrease the glass on both sides. On – to pick and place on the glass “gifts of the sea”. Lay them so that it seemed like they were carelessly scattered and flow from one corner of the table to the other and their number should gradually decrease. Now you need to attach each element using two-component transparent adhesive. While marine items must not protrude over the edges of the flat “box”.
10. You will need to order in the glass workshop of glass with a thickness of 4 mm. glass Size should be such that, based on the frame, it could cover the “box”. Thus on each side of the 1.5 -2 cm frame must be open. In the workshop you need to ask to the edges of the glass are treated and drilled in these holes 4 mm in diameter. Glass need to wipe and cover them to the table. Leather or thin rubber cut gaskets that are under the washers. Using screws, secure the glass. Install them carefully so as not cracked glass.
11. Take the rough thick rope and make one end of the line, which is equal to half the length of the table. Using glue gun, glue the rope folded in half from the center of the long side of the table to its edge. The loop itself (about 12-15 cm) glue is not necessary – it should be free to after you tie the knot. “Skirting” around the perimeter of the glass and around all the corners, keep sticking to it long end of the rope. When you get to the loop, you need to pass in her end of the rope so that you got a reef knot. Now, stretching the rope in the opposite direction, it is necessary to stick.
12. Decorate the outside corner of the table – with the his side, where most of the marine elements. Make the continuation of the song by posting additional details as though they “flow” with the legs of the table directly beneath the glass tabletop.
Ready! Enjoy your creation, and give joy to the guests!
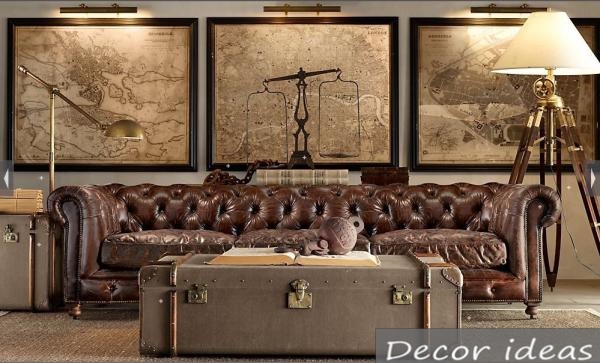
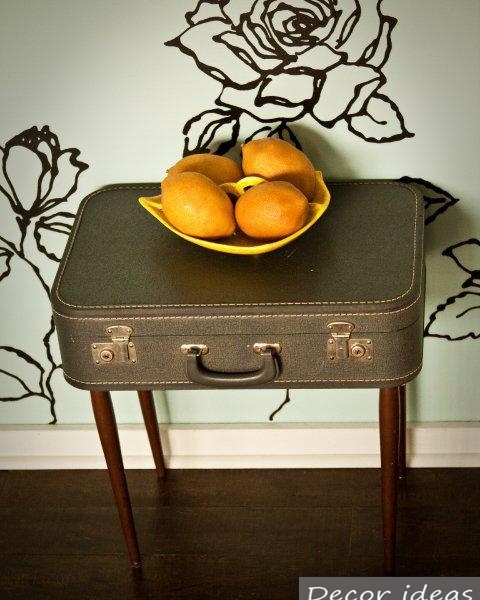
Table-suitcase for travel lovers
Very original solution to an old favorite suitcase which I saw with you the other edges and which do not want to throw through the memories.
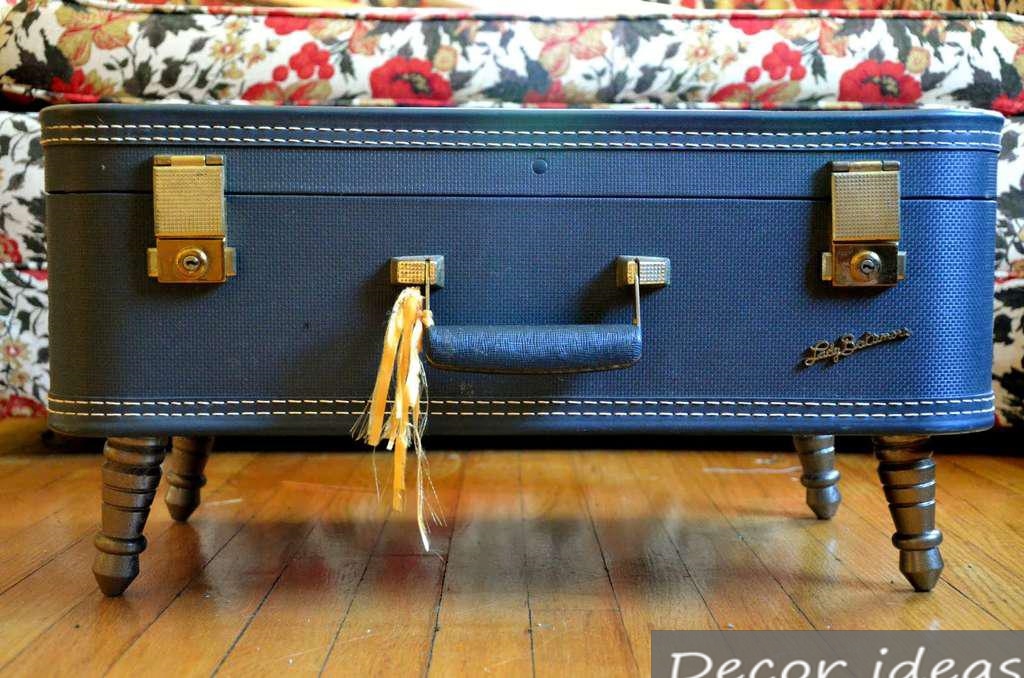
How to do?
To get started go to the store in which you will need to purchase furniture legs (wood or metal). If you want to make a mobile table – then you need to take the wheels. Also you will need plywood, screws and screwdriver.
Now do the layout on the bottom of the suitcase for future legs and drill the holes. As to the tissue of the leg to attach does not work, put it in the suitcase, plywood, do it through the hole markings and also drilled. Now applied to the bottom of the bag mount and fasten the legs. Using hot glue glue to the inside of the suitcase felt.
To give the table its characteristic appearance, reminiscent of distant travel, you can decorate it with stickers, made in the form of stamps or decorate at its discretion.
That’s it – unusual coffee table is ready! By the way, variants of turning of suitcases-in desks huge: by selecting the legs to taste, you can make a table in a retro style or classic. It is not possible to attach legs if you have a massive suitcase – it will look truly incredible: this table will bring to the interior a feeling of adventure and adventure, the spirit of travel and the unknown distant countries.
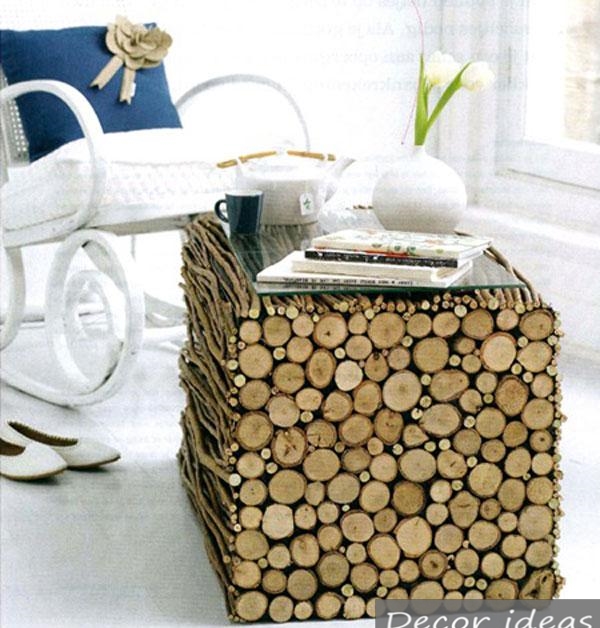
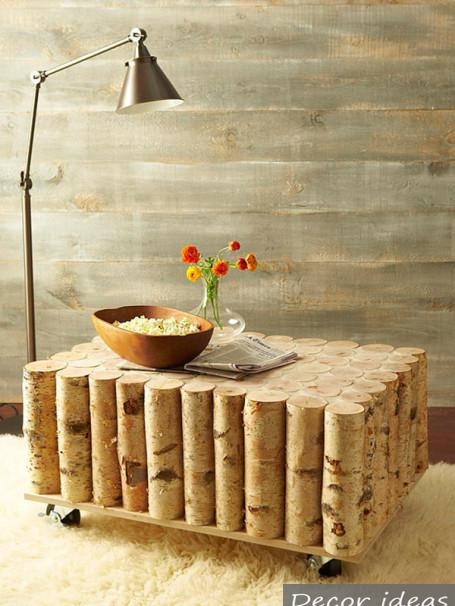
A table of logs for the nature lovers
This table will fit perfectly into the interior of a cottage or country house is warm and natural, it will always evoke the mood of the day in which everything is imbued with peace, birds singing and scents of nature. To make such a magnificent table is also pretty simple.
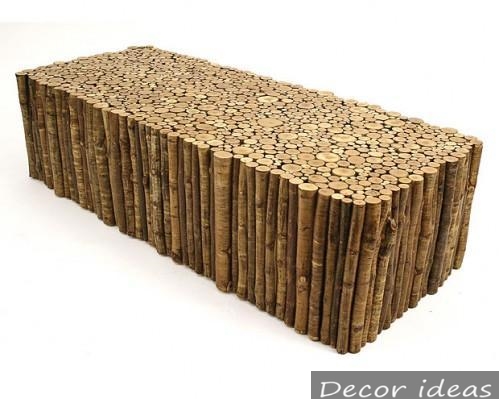
Take the wooden beams (in this case birch) of the same height and width, only 32 pieces. You also need to take the basis for table legs (4 pieces), putty to match the wood, drill and glue designed for wood surfaces.
First you need to collect the basis for the table, then glue around the perimeter of wooden beams, and mid-to sew cardboard. Then to the bottom of the legs fasten. Then glued to the inner surface of the thin wooden plates – it will seem that the table is completely made of wood. Now take the putty and carefully sealed all the voids and then fill to create a completely flat surface. Voila! You are now the owner of a fancy table that will be a highlight of your interior.
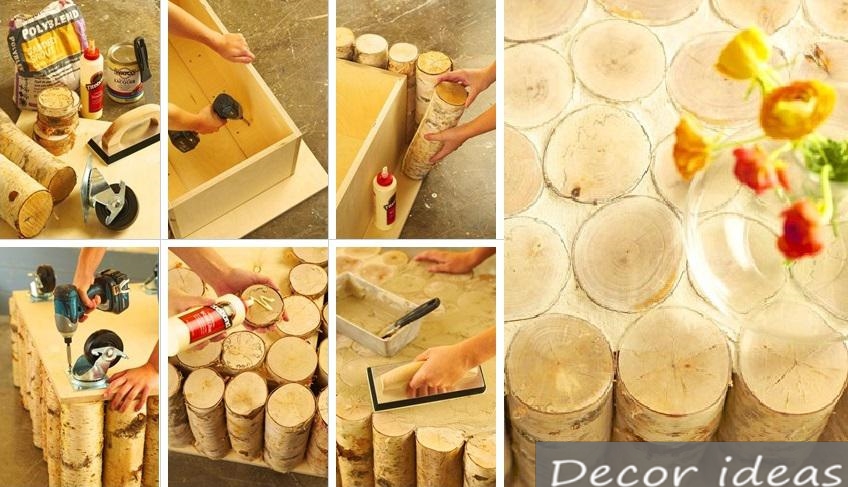
If the idea came to you to taste, under this scheme, you can create other tables using, for example, instead of sticks of branches. To create this table we need to take a plywood box painted with black paint, which is 40х40х60 cm (or any other size at your discretion).
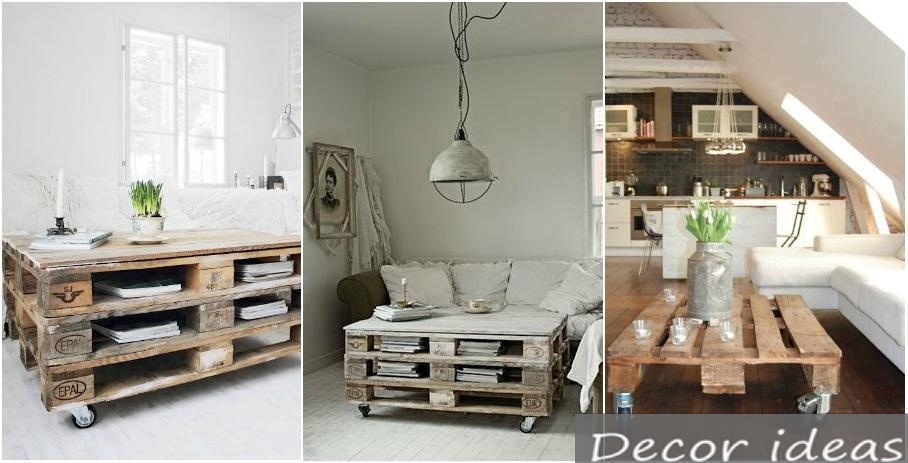
Original table from a pallet
An idea that came to mind of someone truly brilliant. It would seem that it could be made of pallets, which are probably lying in each cottage? And make them very comfortable and functional element of the interior.
How to do?
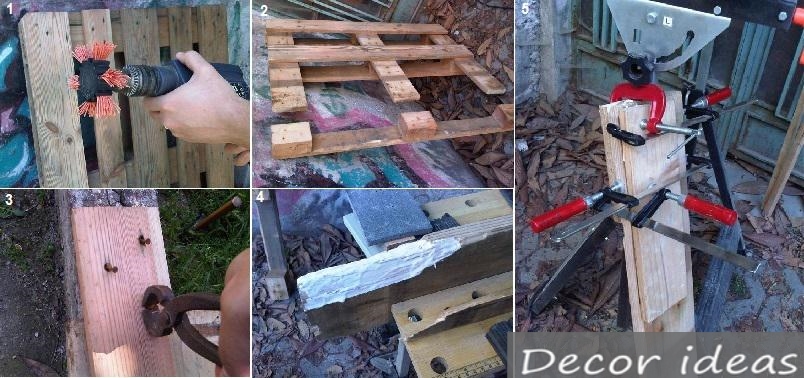
First, gather everything you need for your ideas tools: the tray, drill, vise, hammer, screws, hammer, glue suitable for wood, wheel, soap, primer, screwdriver. Also, take the brush for painting, petal brush-nozzle with abrasive bristles for drills, paint and colorless primer.
The first step is to take a drill with an attachment designed for working wood, and clean the surface of her boards from contamination. Now carefully disassemble the pallet on the polished part. Lightly emboss a large hammer rusty nails and pull them with a claw hammer. Broken pieces of boards stick together with wood glue. At this point, you will need a vise. They need to gently hold down the Board and wait until dry.
Now prepared for the table top part it is necessary to nail and glue on the back side, then clamp them in a vise and wait until dry.
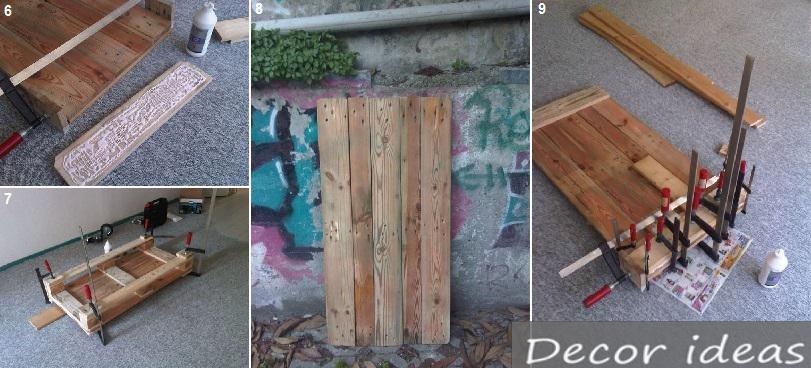
Then cover the table with a colorless primer, and then varnish. Next, the opposite side of the table, mark places for screws to attach the wheels. Otway Drill Drill for fastenings. In order for the screws easily included in timber, brush them with soap and water.
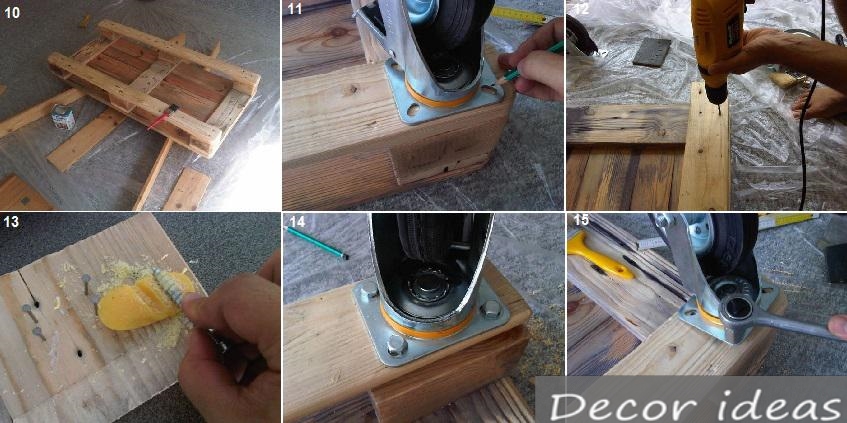
Stylish, compact and very functional table is ready!
A table of boxes
Another original idea is captivating in its simplicity and surprise – well, who would have the idea to build a table out of boxes? And here came, and now you yourself can create at home such an unusual piece of furniture. Surely you will be delighted, and your guests will appreciate the originality of this idea is appreciated.
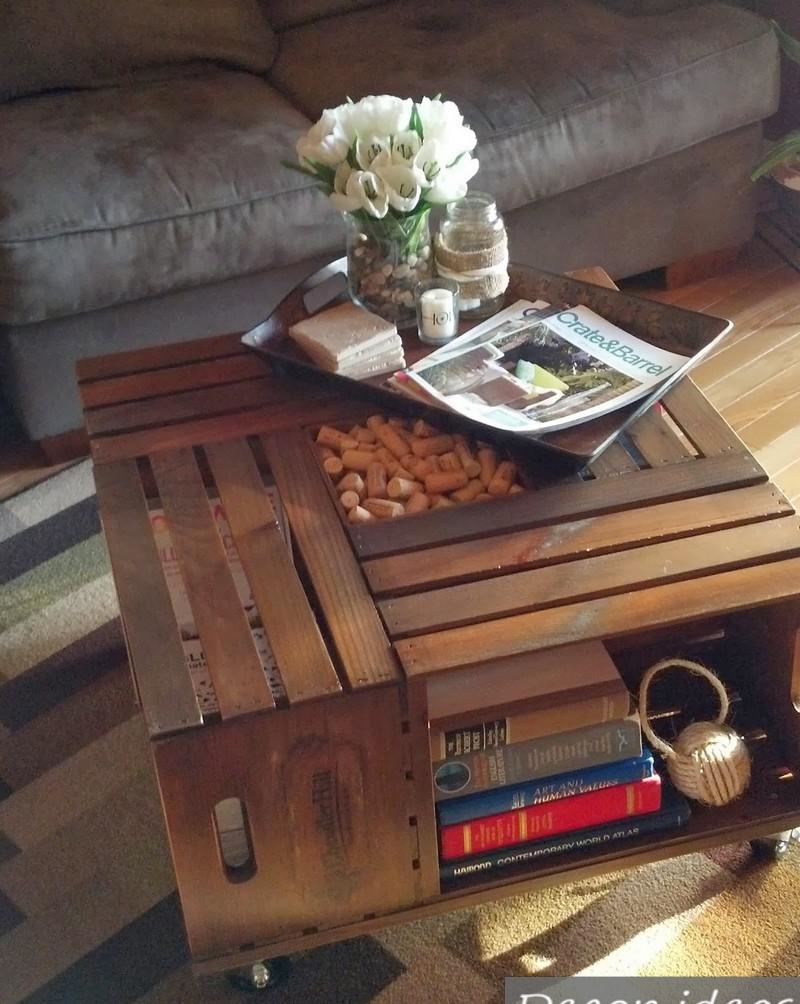
How to do?
Take 4 wooden box, sand paper, lacquer c is a water-based roller and brush, a dowel, a sheet of 10 mm plywood, PVA glue, 4 wheel and screws.
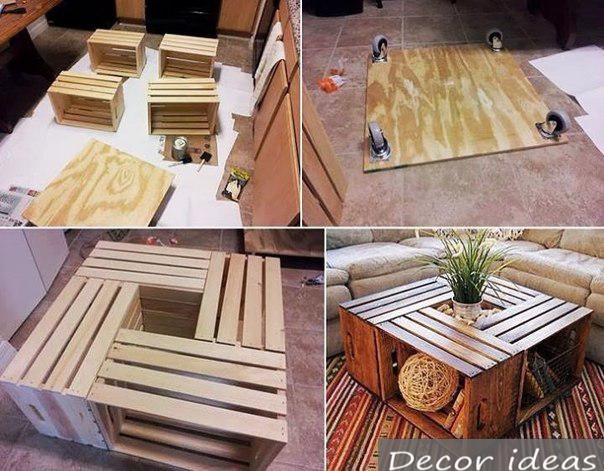
First you need to sand the boxes and cover them with varnish. Then use a drill with a focus to meet the holes on terrahawks. With the help of wood adhesive to fix the dowels in the locations of the fasteners and connect the ends of the boxes together. The sheet of plywood to attach the wheels, and then the sheet to attach to the drawers with screws. Table is ready!
Here are some unusual things you can create from quite ordinary materials. With imagination and the desire for originality and comfort in your home, you can easily work wonders. Look around: perhaps the old window frame has the potential to become an interesting element of the interior?
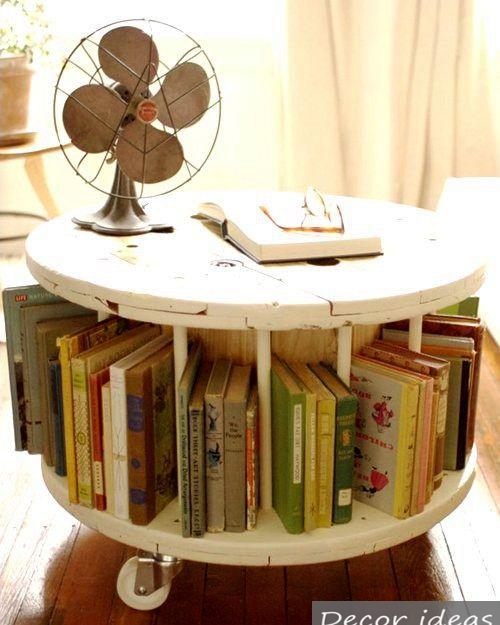
And, maybe, a huge wooden spool from industrial cable can become an elegant piece of furniture?
Believe me, around us a lot of things that can turn into something truly unique and precious. Is just to look at them from a slightly different angle .